Only one allowed host is enough in the container environment. All traffic is coming from Nginx.
Do not set the Host header in Nginx it will screw with the ALLOWED_HOSTS in Python.

The TUBESYNC_HOSTS now only affects the CSRF_TRUSTED_ORIGINS.
If there is a *need* the hosts are required in ALLOWED_HOSTS I would like to know in which scenario.
425 lines
16 KiB
Markdown
425 lines
16 KiB
Markdown
# TubeSync
|
|
|
|
**This is a preview release of TubeSync, it may contain bugs but should be usable**
|
|
|
|
TubeSync is a PVR (personal video recorder) for YouTube. Or, like Sonarr but for
|
|
YouTube (with a built-in download client). It is designed to synchronize channels and
|
|
playlists from YouTube to local directories and update your media server once media is
|
|
downloaded.
|
|
|
|
If you want to watch YouTube videos, in a particular quality, from your local media server
|
|
then TubeSync is for you. Internally, TubeSync is a web interface wrapper on `yt-dlp`
|
|
and `ffmpeg` with a task scheduler.
|
|
|
|
There are several other web interfaces to YouTube and `yt-dlp` all with varying
|
|
features and implementations. TubeSync's main difference is the full PVR experience of
|
|
updating media servers and better selection of media formats. In an effort to be as
|
|
*hands-free* as possible TubeSync includes gradually retrying failed tasks using
|
|
back-off timers. Meaning media which fails to download will be retried for an extended
|
|
period making it, hopefully, quite reliable.
|
|
|
|
|
|
# Latest container image
|
|
|
|
```yaml
|
|
ghcr.io/meeb/tubesync:latest
|
|
```
|
|
|
|
# Screenshots
|
|
|
|
### Dashboard
|
|
|
|

|
|
|
|
### Sources overview
|
|
|
|

|
|
|
|
### Source details
|
|
|
|

|
|
|
|
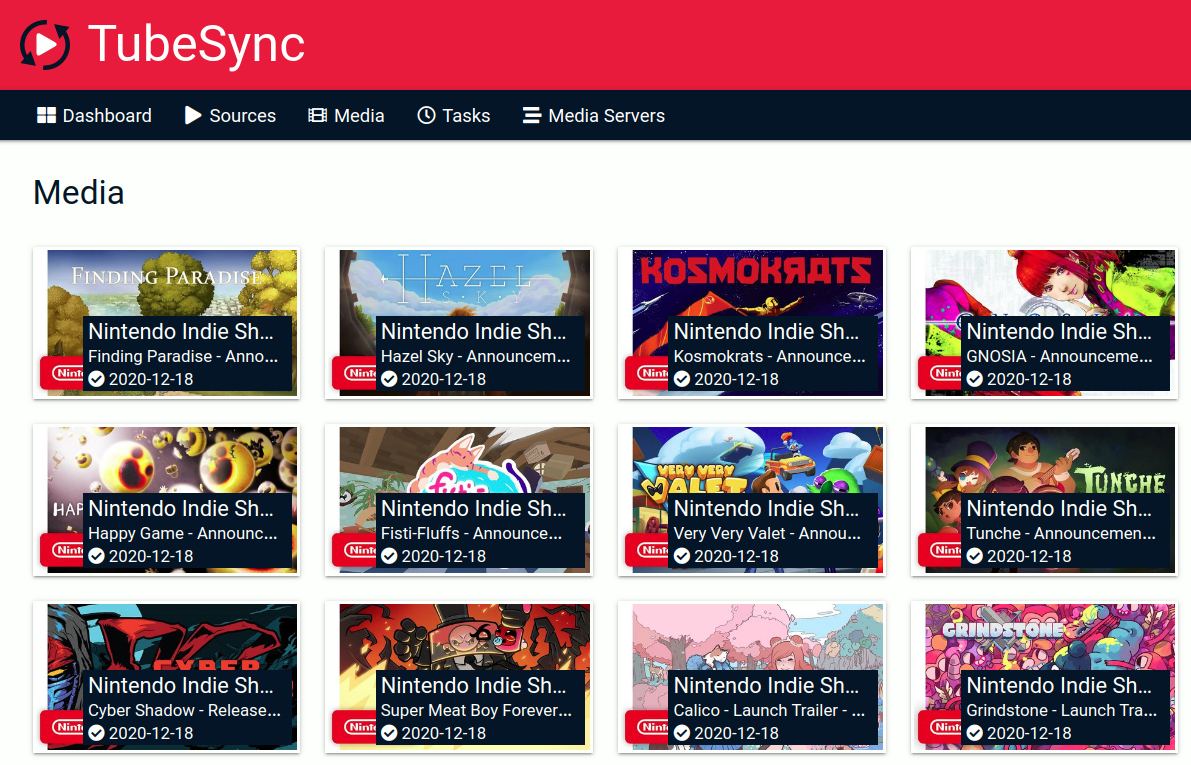
### Media overview
|
|
|
|
|
|
|
|
### Media details
|
|
|
|

|
|
|
|
|
|
# Requirements
|
|
|
|
It's easiest to use a environment like Docker or Podman. Obviously each downloaded
|
|
video takes space and this needs to be available. If you download a lot of media at
|
|
high resolutions this can be a hundreds of gigabytes. Manual installation is
|
|
[documented at the bottom of this readme](#manual-non-containerised-installation).
|
|
|
|
|
|
# What to expect
|
|
|
|
Once running, TubeSync will download media to a specified directory, for docker this is
|
|
`/downloads`. Inside this directory the `video` and `audio` subdirectories will be created.
|
|
All media which only has an audio stream will download to the `audio` directory.
|
|
All media that includes a video stream will be downloaded to the `video` directory.
|
|
All administration of TubeSync is performed via a web interface. Optionally you can add
|
|
a media server to complete the PVR experience (for now only Plex is supported).
|
|
|
|
|
|
# Installation
|
|
|
|
TubeSync is designed to be run in a container, such as via Docker or Podman. It also
|
|
works in a Docker Compose stack. Only the `amd64` architecture is supported for now.
|
|
|
|
|
|
### Prerequisites
|
|
|
|
|
|
#### Find your user id
|
|
|
|
First find your the user ID and group ID you want to run TubeSync as, if you're not
|
|
sure what this is it's probably your current user ID and group ID:
|
|
|
|
```bash
|
|
$ id
|
|
# Example output, in this example, user ID = 1000, group ID = 1000
|
|
# id uid=1000(username) gid=1000(username) groups=1000(username),129(docker)
|
|
```
|
|
|
|
|
|
#### Choose your timezone
|
|
|
|
The timezone can be set using the TZ environment, here's a [list of available timezones](https://en.wikipedia.org/wiki/List_of_tz_database_time_zones). The default timezone is UTC.
|
|
|
|
|
|
#### Create data directories
|
|
|
|
The directories used for downloads and configuration will have to be created first. Choose where you want to store the files and create the two directories using mkdir:
|
|
|
|
```bash
|
|
$ mkdir /some/directory/tubesync-config
|
|
$ mkdir /some/directory/tubesync-downloads
|
|
```
|
|
|
|
|
|
### Install using Docker
|
|
|
|
```bash
|
|
# Pull image
|
|
$ docker pull ghcr.io/meeb/tubesync:latest
|
|
# Start the container using your user ID and group ID
|
|
$ docker run \
|
|
-d \
|
|
--name tubesync \
|
|
-e PUID=1000 \
|
|
-e PGID=1000 \
|
|
-e TZ=Europe/London \
|
|
-v /some/directory/tubesync-config:/config \
|
|
-v /some/directory/tubesync-downloads:/downloads \
|
|
-p 4848:4848 \
|
|
ghcr.io/meeb/tubesync:latest
|
|
```
|
|
|
|
Once running, open `http://localhost:4848` in your browser and you should see the
|
|
TubeSync dashboard. If you do, you can proceed to adding some sources (YouTube channels
|
|
and playlists). If not, check `docker logs tubesync` to see what errors might be
|
|
occuring, typical ones are file permission issues.
|
|
|
|
|
|
### Install using Docker Compose
|
|
|
|
```yaml
|
|
tubesync:
|
|
image: ghcr.io/meeb/tubesync:latest
|
|
container_name: tubesync
|
|
restart: unless-stopped
|
|
ports:
|
|
- 4848:4848
|
|
volumes:
|
|
- /some/directory/tubesync-config:/config
|
|
- /some/directory/tubesync-downloads:/downloads
|
|
environment:
|
|
- TZ=Europe/London
|
|
- PUID=1000
|
|
- PGID=1000
|
|
```
|
|
|
|
|
|
### Optional authentication
|
|
|
|
> Available in `v1.0` (or `latest`) and later.
|
|
|
|
If you want to enable a basic authentication using username and password to access
|
|
the TubeSync dashboard you can set them with the following environment variables:
|
|
|
|
```bash
|
|
HTTP_USER
|
|
HTTP_PASS
|
|
```
|
|
|
|
For example in the `docker run ...` line add in:
|
|
|
|
```bash
|
|
...
|
|
-e HTTP_USER=some-username \
|
|
-e HTTP_PASS=some-secure-password \
|
|
...
|
|
```
|
|
|
|
Or in your Docker Compose file you would add in:
|
|
|
|
```yaml
|
|
...
|
|
environment:
|
|
- HTTP_USER=some-username
|
|
- HTTP_PASS=some-secure-password
|
|
...
|
|
```
|
|
|
|
Only when **both** `HTTP_USER` and `HTTP_PASS` are set then basic HTTP authentication will be enabled.
|
|
|
|
|
|
### Updating
|
|
|
|
To update, you can just pull a new version of the container image as they are released.
|
|
|
|
```bash
|
|
$ docker pull ghcr.io/meeb/tubesync:v[number]
|
|
```
|
|
|
|
Back-end updates such as database migrations should be automatic.
|
|
|
|
|
|
### Moving, backing up, etc.
|
|
|
|
When TubeSync is running in its default container thumbnails, cache and the
|
|
SQLite database are stored in the `/config` directory. This directory should
|
|
be mapped on your host file system. Simply copying or moving this directory
|
|
and making sure the permissions are correct is sufficient to move, back up
|
|
or migrate your TubeSync install.
|
|
|
|
|
|
# Using TubeSync
|
|
|
|
### 1. Add a source (or multiple)
|
|
|
|
Pick your favourite YouTube channels or playlists and copy the url from the browser.
|
|
In TubeSync go to the **`sources`** tab and click the type of content you want to add,
|
|
enter the URL and validate it. This process extracts the key information from the URL
|
|
and makes sure it's a valid URL.
|
|
|
|
<!-- This is the channel name for YouTube channels and the playlist ID for YouTube playlists.
|
|
really not sure what you are trying to say here -->
|
|
|
|
You will then be presented with the initial add a source form. Here you can select
|
|
all the features you want, such as how often you want to index your source and the
|
|
quality of the media you want to download. Once happy, click **`add source`**.
|
|
|
|
|
|
### 2. Let TubeSync download
|
|
|
|
That's about it. All other actions are automatic and performed on timers by scheduled
|
|
tasks. You can see what your TubeSync instance is doing on the **`tasks`** tab.
|
|
|
|
As media is indexed and downloaded it will appear in the **`media`** tab.
|
|
|
|
|
|
### 3. Media Server updating
|
|
|
|
Currently TubeSync supports Plex as a media server. You can add your local Plex server
|
|
under the **`media servers`** tab.
|
|
|
|
|
|
# Logging and debugging
|
|
|
|
TubeSync outputs useful logs, errors and debugging information to the console. The logs can
|
|
be viewed like this:
|
|
|
|
```bash
|
|
$ docker logs --follow tubesync
|
|
```
|
|
|
|
|
|
# Advanced usage guides
|
|
|
|
Once you're happy using TubeSync there are some advanced usage guides for more complex
|
|
and less common features:
|
|
|
|
- [Import existing media into TubeSync](https://github.com/meeb/tubesync/blob/main/docs/import-existing-media.md)
|
|
|
|
- [Sync or create missing metadata files](https://github.com/meeb/tubesync/blob/main/docs/create-missing-metadata.md)
|
|
|
|
- [Reset tasks from the command line](https://github.com/meeb/tubesync/blob/main/docs/reset-tasks.md)
|
|
|
|
- [Using PostgreSQL, MySQL or MariaDB as database backends](https://github.com/meeb/tubesync/blob/main/docs/other-database-backends.md)
|
|
|
|
|
|
# Warnings
|
|
|
|
### 1. Index interval
|
|
|
|
It's recommended to add sources with an index interval as long as possible. This is
|
|
the duration between indexing the source for newly added videos. The default indexing
|
|
interval is 24 hours.
|
|
|
|
|
|
### 2. Indexing massive channels
|
|
|
|
If you add a massive (several thousand videos) channel or playlist to TubeSync
|
|
and choose **`index every hour`** or similar short interval it's entirely possible
|
|
TubeSync may spend its entire time just indexing the massive amount of videos
|
|
over and over again without downloading any media. Check your tasks for the status
|
|
of your TubeSync install.
|
|
|
|
If you add a significant amount of *work* due to adding many large channels you may
|
|
need to increase the number of background workers by setting the `TUBESYNC_WORKERS`
|
|
environment variable. Try around 4 at most, although the absolute maximum allowed is 8.
|
|
|
|
**Be nice.** it's possible your IP address could get throttled by the source if you try and crawl
|
|
extremely large amounts very quickly. **Try and be polite with the smallest amount of
|
|
indexing and concurrent downloads possible for your needs.**
|
|
|
|
|
|
# FAQ
|
|
|
|
### Can I use TubeSync to download single videos?
|
|
|
|
No, TubeSync is designed to repeatedly scan and download new media from channels or
|
|
playlists. If you want to download single videos the best suggestion would be to create
|
|
your own playlist, add the playlist to TubeSync and then add single videos to your
|
|
playlist as you browse about YouTube. Newly added video's to that playlist will
|
|
be downloaded automatically.
|
|
|
|
### Does TubeSync support any other video platforms?
|
|
|
|
At the moment, no. This is a pre-release. However, TubeSync uses
|
|
a library, `yt-dlp`, that supports downloading from hundreds of different video sources.
|
|
So it's likelymore will be added to TubeSync if there is demand for it.
|
|
|
|
### Is there a progress bar?
|
|
|
|
No, in fact, there is no JavaScript at all in the web interface at the moment. TubeSync
|
|
is designed to be more set-and-forget than something you watch download. <!-- the last sentence is a bit odd, needs clarification/better wording --> You can see
|
|
what active tasks are being run in the "tasks" tab and if you want to see exactly what
|
|
your install is doing check the container logs.
|
|
|
|
### Are there alerts when a download is complete?
|
|
|
|
No, this feature is best served by existing services such as the execelent
|
|
[Tautulli](https://tautulli.com/) which can monitor your Plex server and send alerts that way.
|
|
|
|
### There's errors in my "tasks" tab!
|
|
|
|
You only really need to worry about these if there is a permanent failure. Some errors
|
|
are temproary and will be retried for you automatically, such as a download got
|
|
interrupted and will be tried again later. Sources with permanet errors (such as no
|
|
media available because you got a channel name wrong) will be shown as errors on the
|
|
"sources" tab.
|
|
|
|
### Which language is TubeSync written in?
|
|
|
|
Python3 using Django, embedding yt-dlp. It's pretty much glue between other much
|
|
larger libraries.
|
|
|
|
Notable libraries and software used:
|
|
|
|
* [Django](https://www.djangoproject.com/)
|
|
* [yt-dlp](https://github.com/yt-dlp/yt-dlp)
|
|
* [ffmpeg](https://ffmpeg.org/)
|
|
* [Django Background Tasks](https://github.com/arteria/django-background-tasks/)
|
|
* [django-sass](https://github.com/coderedcorp/django-sass/)
|
|
* The container bundles with `s6-init`, `nginx`
|
|
<!-- and redis
|
|
Redis seems to be installed and started but not used, might just be me
|
|
-->
|
|
|
|
See the [Pipfile](https://github.com/meeb/tubesync/blob/main/Pipfile) for a full list.
|
|
|
|
### Can I get access to the full Django admin?
|
|
|
|
Yes, although pretty much all operations are available through the front-end interface
|
|
and you could break things by playing in the admin area. If you still want to access
|
|
it you can run:
|
|
|
|
```bash
|
|
$ docker exec -ti tubesync python3 /app/manage.py createsuperuser
|
|
```
|
|
|
|
And follow the instructions to create an initial Django superuser, once created, you
|
|
can log in at http://localhost:4848/admin
|
|
|
|
### Are there user accounts or multi-user support?
|
|
|
|
There is support for basic HTTP authentication by setting the `HTTP_USER` and
|
|
`HTTP_PASS` environment variables. There is no support for multi-user or user
|
|
management.
|
|
|
|
### Does TubeSync support HTTPS?
|
|
|
|
Yes, but only when using a proxy like nginx, caddy, etc. Configuration of this
|
|
is beyond the scope of this README.
|
|
|
|
### Which architectures are supported in Docker?
|
|
|
|
Just `amd64` for the moment. Others may be made available if there is demand.
|
|
|
|
|
|
# Advanced configuration
|
|
|
|
There are a number of other environment variables you can set. These are, mostly,
|
|
**NOT** required to be set in the default container installation, they are really only
|
|
useful if you are manually installing TubeSync in some other environment. These are:
|
|
|
|
| Name | What | Example |
|
|
| ------------------------ | ------------------------------------------------------------ | ------------------------------------ |
|
|
| DJANGO_SECRET_KEY | Django's SECRET_KEY | YJySXnQLB7UVZw2dXKDWxI5lEZaImK6l |
|
|
| DJANGO_FORCE_SCRIPT_NAME | Django's FORCE_SCRIPT_NAME | /somepath |
|
|
| TUBESYNC_DEBUG | Enable debugging | True |
|
|
| TUBESYNC_WORKERS | Number of background workers, default is 2, max allowed is 8 | 2 |
|
|
| TUBESYNC_HOSTS | Django's ALLOWED_HOSTS | tubesync.example.com,otherhost.com |
|
|
| GUNICORN_WORKERS | Number of gunicorn workers to spawn | 3 |
|
|
| LISTEN_HOST | IP address for gunicorn to listen on | 127.0.0.1 |
|
|
| LISTEN_PORT | Port number for gunicorn to listen on | 8080 |
|
|
| HTTP_USER | Sets the username for HTTP basic authentication | some-username |
|
|
| HTTP_PASS | Sets the password for HTTP basic authentication | some-secure-password |
|
|
| DATABASE_CONNECTION | Optional external database connection details | mysql://user:pass@host:port/database |
|
|
|
|
|
|
# Manual, non-containerised, installation
|
|
|
|
As a relatively normal Django app you can run TubeSync without the container. Beyond
|
|
following this rough guide you are on your own and should be knowledgeable about
|
|
installing and running WSGI-based Python web applications before attempting this.
|
|
|
|
1. Clone or download this repo
|
|
2. Make sure you're running a modern version of Python (>=3.6) and have Pipenv
|
|
installed
|
|
3. Set up the environment with `pipenv install`
|
|
4. Copy `tubesync/tubesync/local_settings.py.example` to
|
|
`tubesync/tubesync/local_settings.py` and edit it as appropriate
|
|
5. Run migrations with `./manage.py migrate`
|
|
6. Collect static files with `./manage.py collectstatic`
|
|
6. Set up your prefered WSGI server, such as `gunicorn` pointing it to the application
|
|
in `tubesync/tubesync/wsgi.py`
|
|
7. Set up your proxy server such as `nginx` and forward it to the WSGI server
|
|
8. Check the web interface is working
|
|
9. Run `./manage.py process_tasks` as the background task worker to index and download
|
|
media. This is a non-detaching process that will write logs to the console. For long
|
|
term running you could use a terminal multiplexer such as `tmux`, or create
|
|
`systemd` unit to run it.
|
|
|
|
|
|
# Tests
|
|
|
|
There is a moderately comprehensive test suite focussing on the custom media format
|
|
matching logic and that the front-end interface works. You can run it via Django:
|
|
|
|
```bash
|
|
$ ./manage.py test --verbosity=2
|
|
```
|
|
|
|
|
|
# Contributing
|
|
|
|
All properly formatted and sensible pull requests, issues and comments are welcome.
|